DIY Raspberry Pi Cat Monitor
1. Project Introduction: DIY Raspberry Pi Cat Monitor
Have you ever considered creating a DIY Raspberry Pi cat monitor to keep an eye on your furry friend at all times? This article will show you how to use Raspberry Pi components to build a high-precision cat monitoring system that not only allows you to view your cat's movements remotely, but also automatically takes photos and sends email notifications when your cat goes to bed!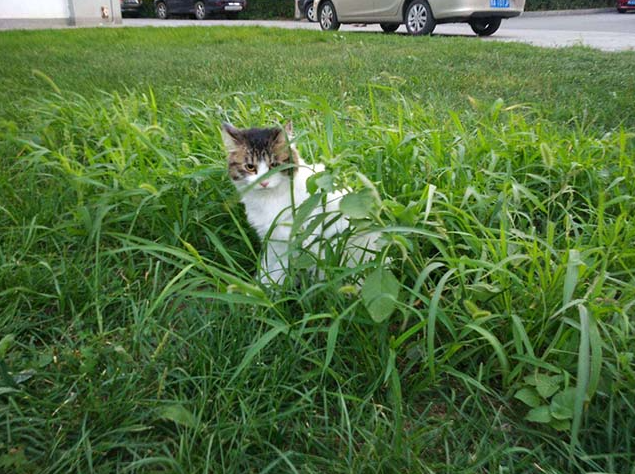
2. Why do you need a DIY cat monitor?
As more and more pet-owning families consider their pets to be important members of their households, the pet economy is booming, and owners' demand for pet monitoring is growing, highlighting the apparent shortcomings of traditional pet monitoring devices:
(1) Inability to accurately identify cats:Ordinary cameras are designed based on traditional home security monitoring technology and lack specialized algorithms for identifying cats, making it difficult to distinguish between people and pets and resulting in frequent false alarms.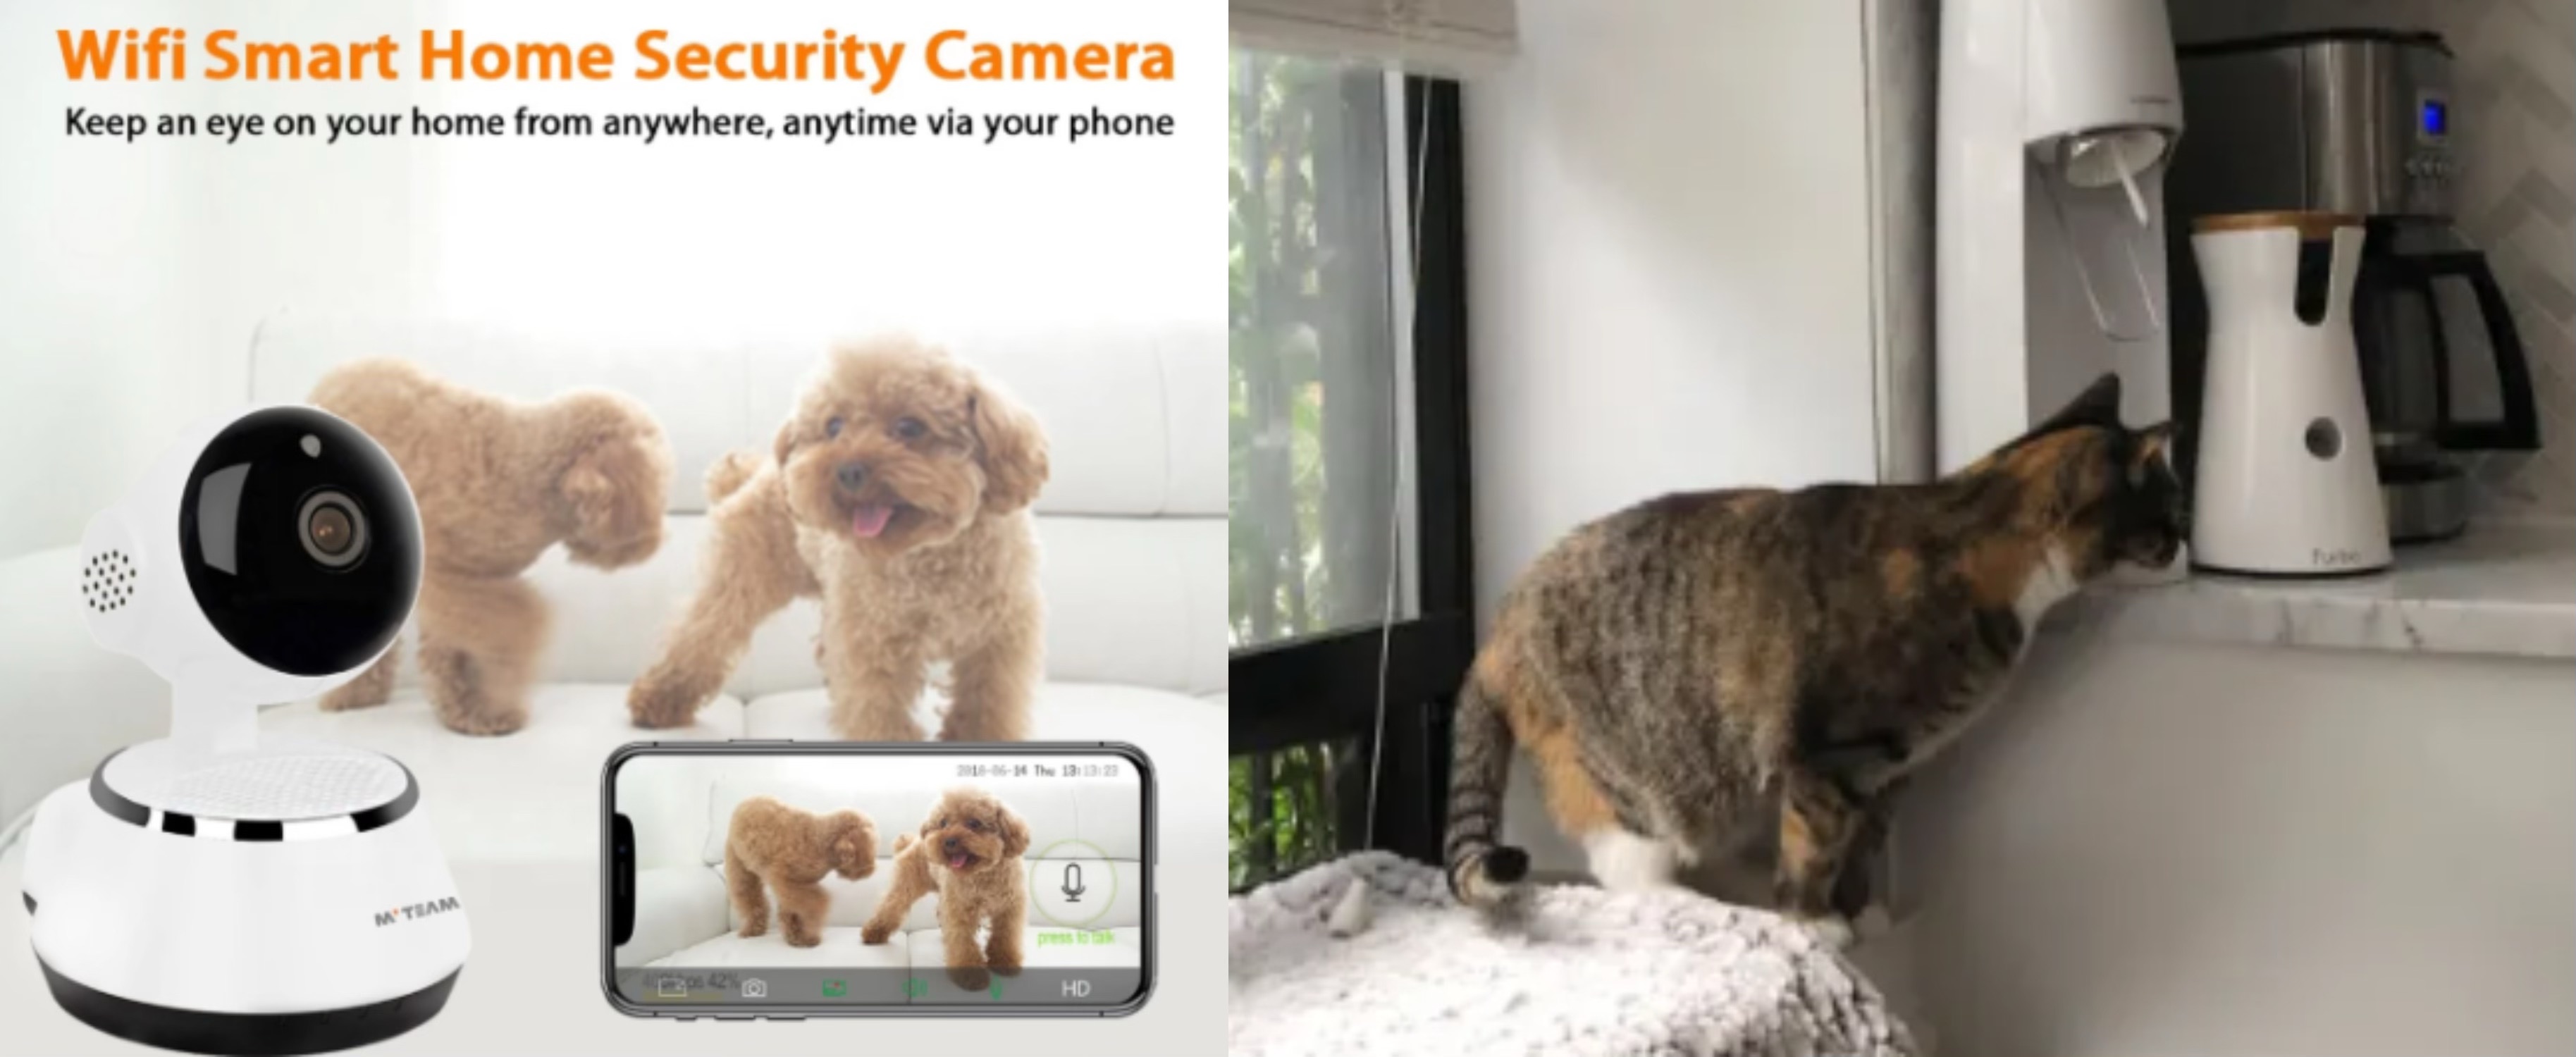
(2) Poor sensitivity:Captures a large number of useless images, misses key activities of cats, reduces the value of the device, and negatively impacts the user experience.
A DIY cat monitor, made with a Raspberry Pi and computer vision algorithms (such as Haar feature detection), can accurately capture the cat's movements and avoid false triggers.Project Introduction: DIY Raspberry Pi Cat Monitor
3. Hardware Solution
The core hardware of this solution includes:
(1) Raspberry Pi 3B (Master Control Unit)
(2)Raspberry Pi CSI Camera Module (Dedicated camera, low latency, high compatibility)
(3) 5V/2A power adapter + router (remote data transmission)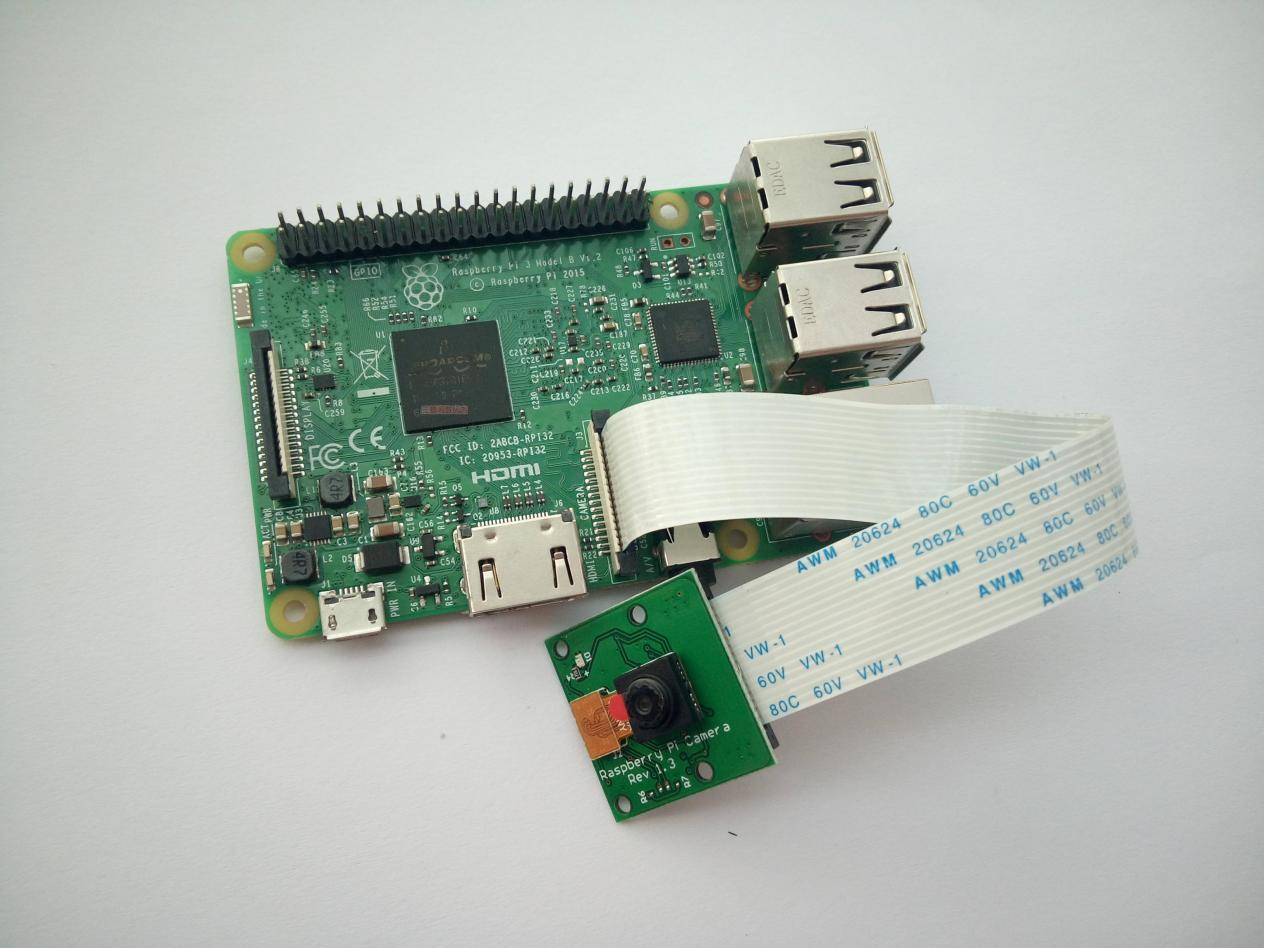
4. Monitoring Principle: How to Identify Cats?
The system utilizes the Raspberry Pi camera to capture real-time video footage and employs the OpenCV Haar algorithm to detect cat facial features.
When a cat is identified:
(1) Automatically save the photo (in JPEG format)
(2) Send the photo via email to the owner's gmail account
Compared to traditional monitoring systems, the optimizations of the DIY Raspberry Pi :
(1) Adjust the loop counter (controllable photo capture frequency)
(2) Optimize the filtering threshold (reduce false alarms and enhance user experience)
5. Development Environment Configuration Guide
5.1 Software Installation
(1) Development Toolchain Configuration
(1) Install the g++ editor
(2) Configure the OpenCV computer vision development environment
(2) Email Push Service Subsystem
(1) Deploy MSMTP Email Transfer Agent
(2) Install MUTT Email Client Suite
(3) Recommended to use gmail's SMTP service
5.2 Hardware Driver Layer Preparation
Mount the V4L2 video driver module (bcm2835-v4l2) specific to the BCM2835 chip.
6. Available development code and resources
The algorithm implementation discussed in this article includes the following two core files.The source code is available for download here:
6.1 Haar-based cat face detection model
haarcascade_frontalcatface.xml
Function: A pre-trained cat face detection model based on Haar features, which can be directly integrated into OpenCV projects
6.2 C++ source code files
File name: cat.cpp
Function: Complete example code for cat face detection, including image acquisition, model loading, and detection logic.
6.3 Resource source code:
Here we provide source code for download:https://drive.google.com/file/d/1jlsCDG0-oIrne6KRW6aKEwUYEGAXjMuT/view?usp=drive_link
7.Code Debugging Methods
In the field of electronic engineering and embedded development, precise debugging and stable algorithm operation are critical. We will explain the adjustments to key parameters and email configuration in the cat.cpp file to optimize the performance of the cat face detection system.
7.1 Loop Count Adjustment (Line 21)
The if (k < 10) statement in the code controls the loop count, resetting the variable k to zero after every 10 iterations. In a Raspberry Pi 3B hardware environment, 10 iterations take approximately 15 seconds.
This value can be modified to adjust the email sending frequency as needed:
Reduce frequency: Increase the value (e.g., 20 or 100).
Increase frequency: Decrease the value (e.g., 2 or 5).
7.2 Threshold Filtering Optimization (Lines 32 and 34)
The threshold variable represents the confidence level of cat face detection after low-pass filtering (range 0–1), used to suppress occasional misclassifications by the Haar classifier. The current method uses a weighted average algorithm, which can be adjusted as follows:
Enhance filter damping:
Change threshold += 1 to threshold += 0.5;
Simultaneously adjust threshold = threshold / 2 to threshold = threshold / 1.5
7.3 Email trigger logic and configuration (lines 37 and 41)
(1) Trigger condition
See line 37 of the code
if (threshold > 0.999&&k==0)i.e., when the recognition value is greater than 0.999 and the loop counter value k=0, the system takes a photo and sends an email.
(2) Email address modification
Replace line 41
system(“echo \”cat face\“ | mutt -s \”RaspberryCamera\“ news@gmail.com -a cat.jpg") with your valid email address (recommended to use a gmail address to avoid server rejection).
7.4 Compilation and execution instructions
(1) Compilation command
g++ -ggdb cat.cpp -o iccat pkg-config --cflags --libs opencv` (Note: Enclose the pkg-config parameters in single quotes.)
(2) Run the program
./iccat By adjusting the above parameters appropriately, you can significantly improve the response speed and stability of the detection system. You can optimize the system according to your specific needs.
8. Installation recommendations: Where should the camera be placed?
After developing the home pet monitoring camera, testing revealed that its field of view was 65°, a parameter that limits the monitoring capabilities of a single device in large indoor areas. Therefore, how to reasonably plan the installation location of the camera to maximize the capture of the pet's activity trajectory has become a key consideration during deployment.
Based on an analysis of feline behavior patterns, we recommend prioritizing the following two high-traffic areas for camera placement:
(1) Pet resting areas (e.g., cat beds)
(2) Human sleeping areas (e.g., beds)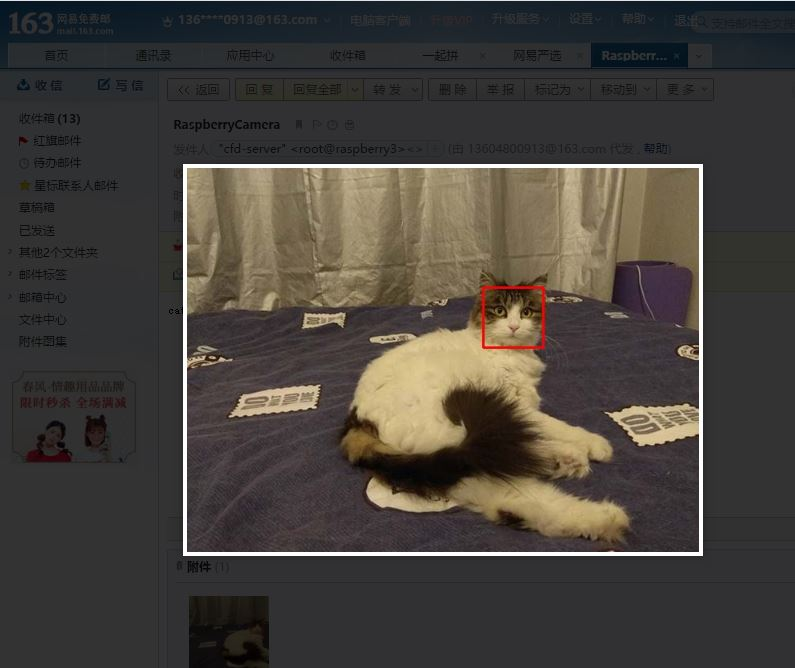
The theoretical basis for this recommendation is that scientific research shows that adult cats sleep for 12-16 hours a day, with a significant proportion of that time spent in a state of rest. By focusing on these core areas, adequate monitoring time can be significantly increased under limited field of view conditions, while reducing equipment deployment costs.

9. Future Applications: More Than Just Cat Monitoring!
The cat monitoring camera, based on open-source computer vision algorithms, can capture high-precision images of cats. Through advanced classification and filtering algorithms, the system can effectively eliminate interference from non-target objects such as humans and dogs, significantly reducing false trigger rates.
This DIY Raspberry Pi cat monitor has a wide range of potential applications and can be expanded to:
(1) Pet Hospitals: Automatic identification of pet identities to enable automatic access
(2) Airport Security: Rapid screening of pets to enhance security efficiency and reduce manual intervention
(3) Smart Wearable Devices: Integration with health monitoring to optimize behavior detection and health management using visual algorithms
In the future, with ongoing algorithm optimization and hardware performance improvements, this technology is expected to achieve broader applications in the field of pet intelligent monitoring, driving the thoughtful development of the industry.
Recommended Reading: