SSL Accessories

Results:

SSL accessories are supporting parts used with solid-state lighting and LED connector systems. These products include covers, caps, boots, strain reliefs, ring clips, retaining nuts, socket protectors and series-specific bridge components. Select an accessory by locating its position in the connector assembly, identifying its mechanical or electrical function, and confirming the exact connector series it supports.

Locate the Accessory on the Connector Assembly

An SSL accessory can fit at the cable entry, around the connector body, over the mating face or between lighting modules. Use the assembly position to identify the required accessory family.

Starting point
Lighting Cable
→
Cable entry
Boot or Strain Relief
→
Retention point
Clip or Ring Nut
→
Core component
SSL Connector
→
Mating face
Cap or Protector
→
Final interface
LED Module

Some assemblies use only one accessory, while sealed or mechanically retained systems may require several coordinated parts.

Identify the Accessory’s Job

Accessory names can vary between manufacturers. Determine what the part does in the completed assembly before comparing dimensions.

Cable protection Boots and Strain Reliefs
Support the cable at the connector entry and control bending or pulling loads. Match the connector series, cable diameter, exit direction and material.
Mechanical retention Ring Clips and Nuts
Secure the connector, tube, housing or cable interface. Confirm thread, diameter, mounting direction and the related plug or receptacle.
Interface protection Caps and Covers
Cover an unused or exposed interface and may provide insulation, dust protection or a defined wire stop. Match the connector side, series and positions.
Contact protection Socket Protectors
Protect connector sockets or lighting interfaces during handling, shipment, installation or periods when the mating component is absent.
System connection Bridge and Bus Parts
Extend or connect compatible modules within a manufacturer-defined SSL system. Follow the system diagram, polarity and related-product information.

Match the Connector Series

SSL accessories are usually series-specific. A cap, boot or nut with similar external dimensions may use a different latch, thread, seal or mounting interface.

Build the compatibility reference from the core connector outward
Connector manufacturer → Product series → Connector part number → Related accessory part number

Use the manufacturer’s “For Use With,” “Related Products,” system drawing or accessory table as the compatibility source.

Check the Mechanical Interface

Compare the dimensions that determine whether the accessory can be installed and perform its intended function.

Accessory position
Confirm whether the part installs at the cable entry, around the housing, over the mating face or between lighting modules.
Positions and connector size
Match the number of positions and the physical format of the compatible plug, receptacle or contact assembly.
Cable diameter
For boots, tubes, ring nuts and strain-relief products, compare the complete cable outside diameter and exit direction.
Thread and fastening method
Check thread form, clip geometry, latch position, mounting direction and required installation tool.
Installed envelope
Verify that the completed assembly fits the luminaire, enclosure opening and service-access space.

Match Material to the Lighting Environment

Accessory materials must tolerate the heat and environment around the LED module, driver or outdoor lighting interface.

Material or feature Check against Typical accessory concern
Nylon, PBT or polycarbonate Temperature and mechanical load Covers, nuts, clips and protectors
Rubber or elastomer Cable fit, flexibility and environment Boots and strain reliefs
UV or weather resistance Outdoor exposure and installation life Exterior lighting connections
Sealing feature Moisture, dust and unused interfaces Caps, covers, boots and sealed systems

Confirm the exact temperature, sealing and environmental performance in the accessory and connector datasheets.

Assemble the Lighting Connection in Order

Installation order matters when boots, clips or nuts must be placed on the cable before contacts and housings are assembled.

  1. 1 Review the assembly drawing. Identify every series-specific accessory and its installation orientation.
  2. 2 Preload cable-side parts. Place boots, tubes, nuts or clips on the cable before terminating contacts when required.
  3. 3 Terminate and insert contacts. Follow the approved contact, wire and tooling specification.
  4. 4 Secure the housing. Install the specified nut, clip, strain relief or retention component.
  5. 5 Protect unused interfaces. Fit the approved cap, cover or socket protector where the system design requires it.
Assembly BOM sequence
Lighting cable → Boot or strain relief → Clip or nut → SSL connector → Cap or protector

If the design requires a complete LED connector assembly rather than a supporting accessory, browse Solid-State Lighting (SSL) Connectors.

Read More
SSL AccessoriesResults:
Comprehensive
Price Priority
Stock Priority
Image
Part Number
Description
Availability
Unit Price(USD)
Quantity
Operation
CONN LED 2POS W/ MOULDING SMT
Available Stock
4,891
Estimated Ship Time:9-14 working days
25+$0.9132
50+$0.8696
100+$0.828
- +
Ext. Price(USD):$26.48
MOQ:29
Mult:1
SPQ:1
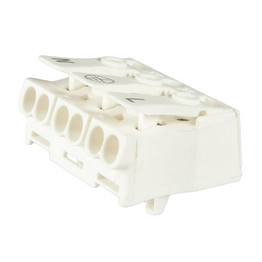
CONN LUMINAIRE 3POLE W/PRNT
Available Stock
495
Estimated Ship Time:9-14 working days
25+$0.8389
50+$0.7988
1,000+$0.6464
2,500+$0.6059
- +
Ext. Price(USD):$26.00
MOQ:31
Mult:1
SPQ:1
25 / PageGoto
